


WiFi App Communication Data Monitor for Prostar Solar Charge Controller
Cloud-Box-M1
Tips:This product is currently suitable for the use of Prostar SunSaver series and SunSmart series MPPT Solar Charge Controller.

Prostar SunSaver Series MPPT Solar Charge Controller Connection

Prostar SunSmart Series MPPT Solar Charge Controller Connection
Introduction
Wifi App Two type of working modes:
1 : WIFI hotspot routing mode, Access Point(referred as AP mode below),In this mode , Cloud-Box-M1 acts as hotspot, allowing other wireless terminals devices access and providing data access;
2 : The wireless terminal mode, Station (referred as STA mode below), Cloud-Box-M1 can be connected to the router WIFI hotspots, but itself does not accept wireless access.
Wifi App Features
● Easy to install and operate. Prolong the battery life cycle and keep the load work well.
● Circuit protection: overvoltage protection, under voltage protection, current protection.
● Real-time monitoring of data. Status indicator of working mode – AP / STA mode.
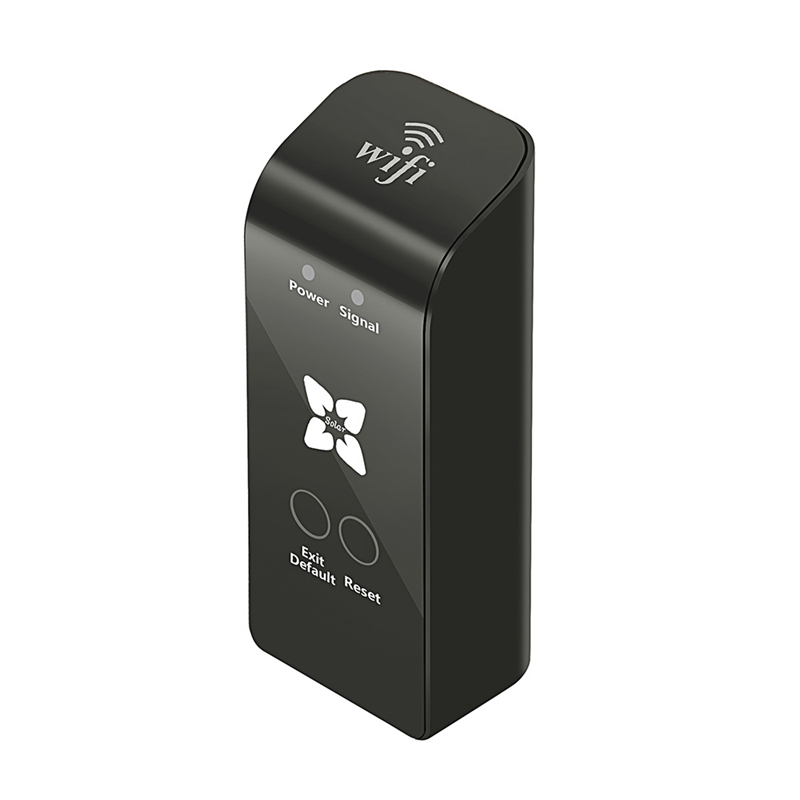
Usage of Key instructions
Exit/Default Press: Click on button — Switch to AP/STA mode
Long press for 6~8 seconds—To STA mode, making Cloud-Box-M1 enter to STA pending state(Reset the password of router set in last time)
–To AP mode, reinitialize firmware after updating
Reset press: Reset switch.
Status indicator of working mode
When restarting the power or pressing the Reset button:
If the “signal“ light will continue to shine for 10 seconds, then flashing, it means working in AP mode.
If the “signal” light flashing immediately, it means working in STA mode.
The steps of configuring in AP mode
1.Ensure Cloud-Box-M1 under AP mode.
2.Search WIFI hotspot–”MyGreen-Solar-XXXX”in mobile, with the password “88888888” to connect the hotspot.
3.Open APP in Mobile or Pad and come to home page, click on the “AP mode” in the upper- left to enter the monitoring center.
The steps of configuring in STA mode
1.Ensure Cloud-Box-M1 under AP mode
2.Connect to the router hotspot on mobile
3.Make sure the Cloud-Box-M1 in the signal range of router.
4.Once Cloud-Box-M1 configured, with hotspot click on the “LAN search” to search device; under4G(or cellular) or connected to hotspot, click on the “Qr code scanning” scan Qr code of Cloud-Box-M1 to search device.
5.For the first configuring, open APP in Mobile or Pad and come to home page, click on the “Menu” in the top right, then click on the “Add Device” to input password. After pressing “OK” to confirm, go ahead to search all the “Cloud-Box-M1” device in the signal range of router. Once matched, click on the “Back” in the upper-left come back to home page, choose the right one from the list to enter the monitoring center.
Manage the list of device
On the home page,For IOS version, swipe left and right to manage the list , select “Editor” then “Rename” working. selecting “Share QRcode” to Share the QR code of the current device; click on the “Delete”, deleting the current device information. ( For Android version, long press the device needed manage in the list, and then appear a list read “Rename”,”Share QRcode”, “Delete”.)

Product Details


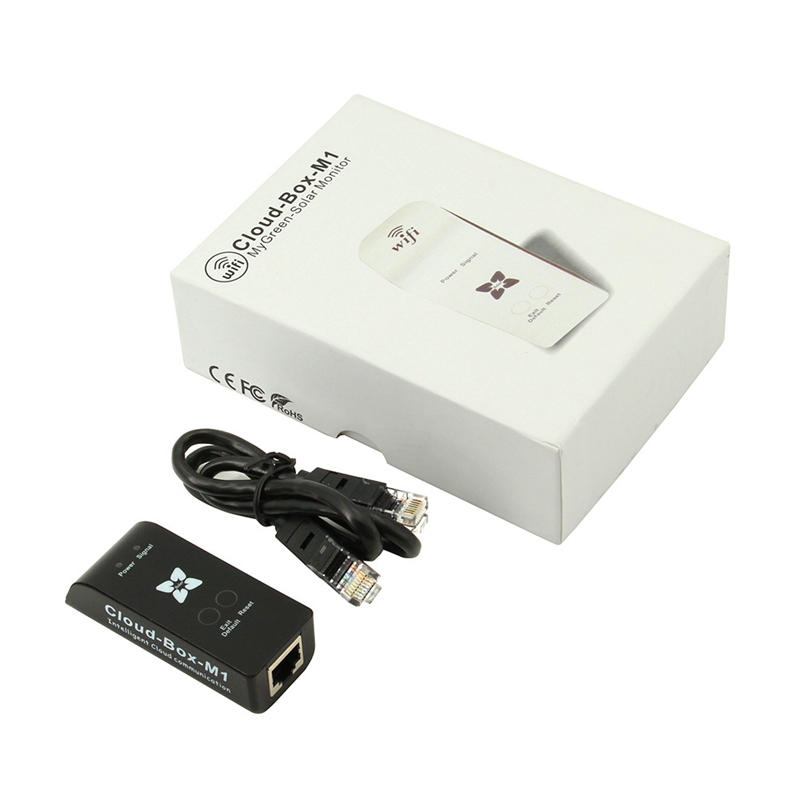
Shipping Package

The Articles You may Like
- Advantages of Grid-Tied Systems
- Top 10 solar energy benefits
- PV Junction Box: purpose and connection
- How to install solar panels?
- How to assemble MC4 connectors and MC4 wiring cables
- The solar panels lifespan
You also can browse Prostar Google Driver to learn more about Company and Products
● Backlight time limit: 10s
● Constant voltage charging voltage: 14.2V
● Floating charge voltage: 13.8V
● Lift charge voltage: 14.4V
RELATED PRODUCTS
Download CATALOG

